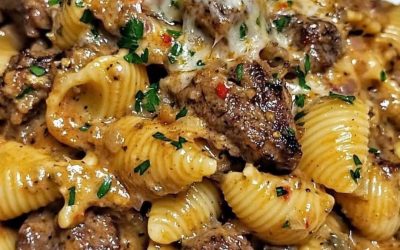

 Page 2: Making the Hearty Meat Sauce & Cheese Filling
 Sautéing the Aromatics & Meat
-
Sauté the Onion: In a large pot or Dutch oven, heat 2 tablespoons of olive oil over medium-high heat. Add the chopped onion and cook until it softens and becomes translucent, about 5-7 minutes. Stir occasionally. Mmm, that smell!

-
Brown the Beef: Add the ground beef to the pot. Break it up with a spoon and cook until it is fully browned.
-
Drain the Fat: Carefully drain off any excess grease from the pot. This keeps the final dish from being too oily.

-
Add Garlic: Stir in the minced garlic and red pepper flakes (if using). Cook for about 1 minute until fragrant. Be careful not to burn the garlic!

 Simmering the Rich Tomato Sauce
-
The Tomato Base: Pour in the crushed tomatoes, tomato sauce, and beef broth (or red wine). Stir well to combine everything.
-
Seasoning Time: Add the Italian seasoning, dried basil, sugar, 1/2 of the grated Parmesan cheese, salt, and pepper. Give it a good stir.

-
Simmer Down: Bring the sauce to a gentle simmer. Reduce the heat to low, cover the pot slightly (leaving a small gap for steam), and let it simmer for at least 20-30 minutes. This slow cooking process allows the flavors to meld beautifully and thicken the sauce. Patience is a virtue!

 Creating the Creamy Ricotta Layer
While the sauce is simmering, let’s prepare the luscious ricotta filling!
-
Mix the Ricotta: In a medium bowl, combine the entire container of ricotta cheese, the lightly beaten egg, the nutmeg, and half of the fresh chopped parsley (about 2 tablespoons).
-
Season: Season the ricotta mix with a pinch of salt and pepper.
-
Stir: Mix everything until it’s smooth and well combined. The egg helps the ricotta set in the oven, making a wonderful creamy layer!

 Page 3: Assembly, Baking, and Serving!
 The Grand Assembly
It’s time to bring all the delicious components together! 
-
Sauce the Pasta: Take your large pot of drained pasta. Pour about 2/3 of the meat sauce over the pasta and stir gently until every piece of pasta is coated in the rich, savory sauce. Keep the remaining 1/3 of the sauce aside.

-
First Layer: Spread about half of the remaining meat sauce (about 1/6 of the total sauce) on the bottom of your prepared 9×13 inch baking dish. This prevents the pasta from sticking and keeps it moist.

-
Pasta Layer: Scoop all the sauced pasta into the baking dish and spread it out evenly. Press it down lightly.
-
Ricotta Dots (or Spread): You can do this two ways:
-
Option A (Creamier): Spread the entire ricotta mixture evenly over the top of the pasta layer.
-
Option B (Chunkier/Hidden): Drop dollops of the ricotta mixture randomly over the pasta. The heat will melt it into the dish!
-
-
Final Sauce: Pour the last bit of the meat sauce (the remaining 1/6) evenly over the ricotta/pasta. This ensures you have great flavor on top!

-
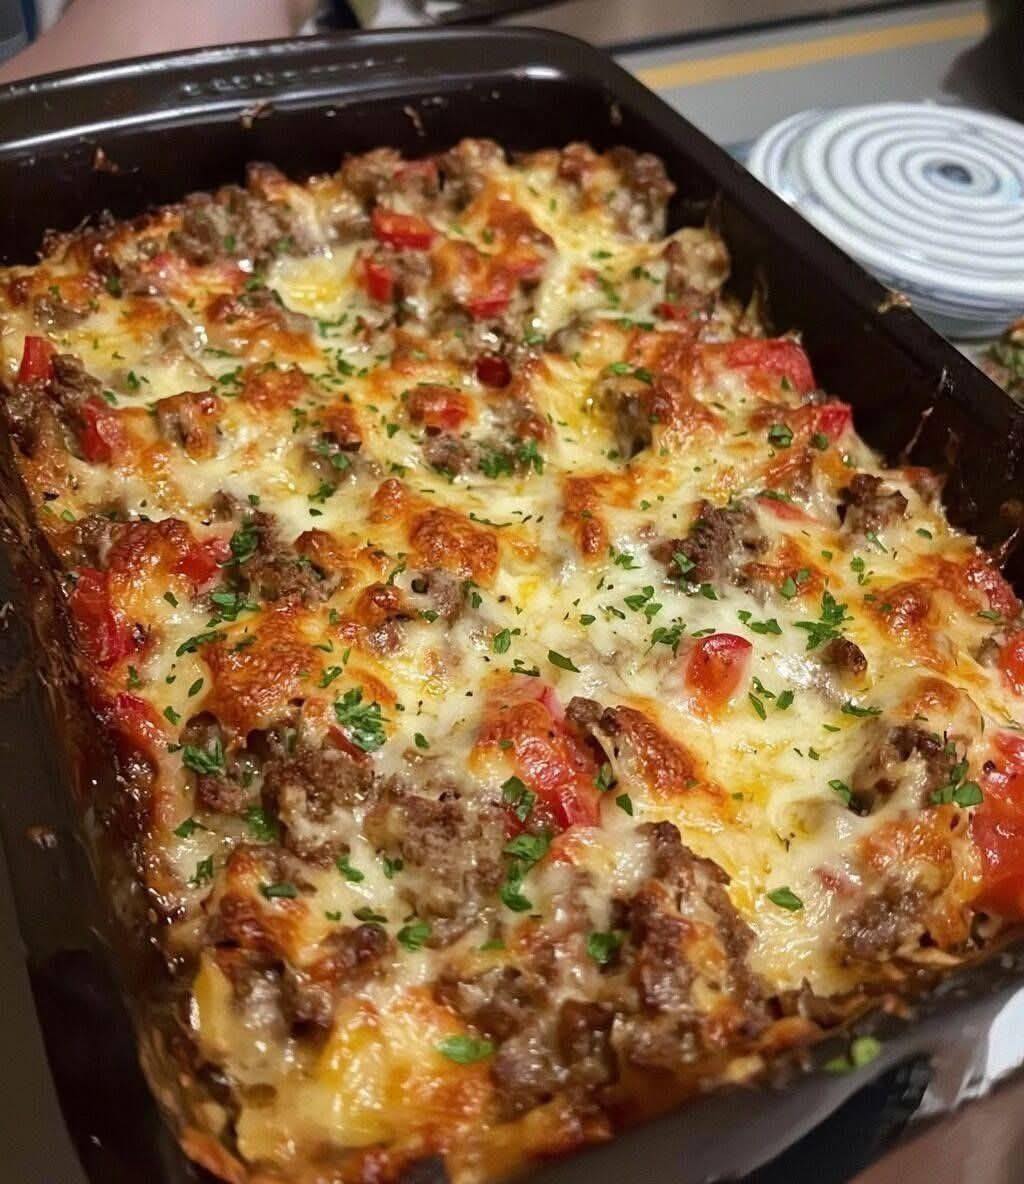
The Cheese Blanket: Now for the pièce de résistance! Sprinkle the shredded mozzarella cheese generously over the entire surface. Finally, top it all off with the remaining grated Parmesan cheese. A perfect cheese crown!

 Baking to Golden Perfection
-
Initial Bake (Covered): Cover the baking dish tightly with aluminum foil. This traps the steam and ensures the pasta and ricotta cook through evenly without drying out.
-
Bake: Place the casserole in the preheated 375°F (190°C) oven and bake for 20 minutes.

-
Uncovered Bake: Carefully remove the aluminum foil. Return the casserole to the oven and bake for another 15-20 minutes, or until the cheese is melted, bubbly, and has achieved that gorgeous golden-brown color you see in the picture!
If you want it extra crispy, you can switch on the broiler for the last 1-2 minutes, but watch it very closely! 
 Rest and Serve!
-
Rest: Once the casserole is out of the oven, let it rest on a cooling rack for 10-15 minutes. This is the hardest part, but it allows the casserole to set up, making it easier to serve and preventing it from turning into a soupy mess!

-
Garnish: Just before serving, sprinkle the remaining fresh chopped parsley (and maybe a few fresh basil leaves!) over the top for a pop of color and freshness.

-
ENJOY! Serve with a side salad and some crusty garlic bread. Buon Appetito!